Windows and symfony
by Laurent Bonnet
Overview
This document is a new step-by-step tutorial covering the installation, deployment and functional test of the symfony framework on Windows Server 2008.
In order to prepare for Internet deployment, the tutorial can be executed in a dedicated server environment, hosted on the Internet.
Of course, it's possible to complete the tutorial on a local server, or a virtual machine at the reader's workstation.
Reason for a new Tutorial
Currently, there are two sources of information related to Microsoft Internet Information Server (IIS) on the symfony website , but they refer to previous versions that have not evolved with newer versions of Microsoft Windows operating systems, especially Windows Server 2008 (released in February, 2008), which includes many changes of interest to PHP developers:
-
IIS version 7, the version embedded in Windows Server 2008, was entirely rewritten to a fully modular design.
-
IIS 7 has proven to be very reliable, with very few fixes needed from Windows Update since the launch of the product.
-
IIS 7 also includes the FastCGI accelerator, a multi-threaded application pool that takes advantage of the native threading model of Windows operating systems.
-
The FastCGI implementation of PHP equates to a 5x to 10x performance improvement in execution, without cache, when compared to traditional ISAPI or CGI deployments of PHP on Windows and IIS.
-
More recently, Microsoft opened the curtain on a cache accelerator for PHP, which is in Release Candidate status at the time of this writing (2009-11-02).
Planned Extension for this Tutorial
A supplemental section of this chapter is in the works and will be released on the symfony project web site shortly after the publication of this book. It covers the connection to MS SQL Server via PDO, something Microsoft is planning improvements for soon.
 [PHP_PDO_MSSQL]
 extension=php_pdo_mssql.dll
Currently, the best performance in code execution is obtained by the Microsoft native SQL Server driver for PHP 5, an open-source driver available on Windows and currently available in version 1.1. This is implemented as a new PHP extension DLL:
 [PHP_SQLSRV]
 extension=php_sqlsrv.dll
It is possible to use either Microsoft SQL Server 2005 or 2008 for the database. The planned tutorial extension will cover the usage of the edition that is available for free: SQL Server Express.
How to play with this Tutorial on different Windows Systems, including 32-bit
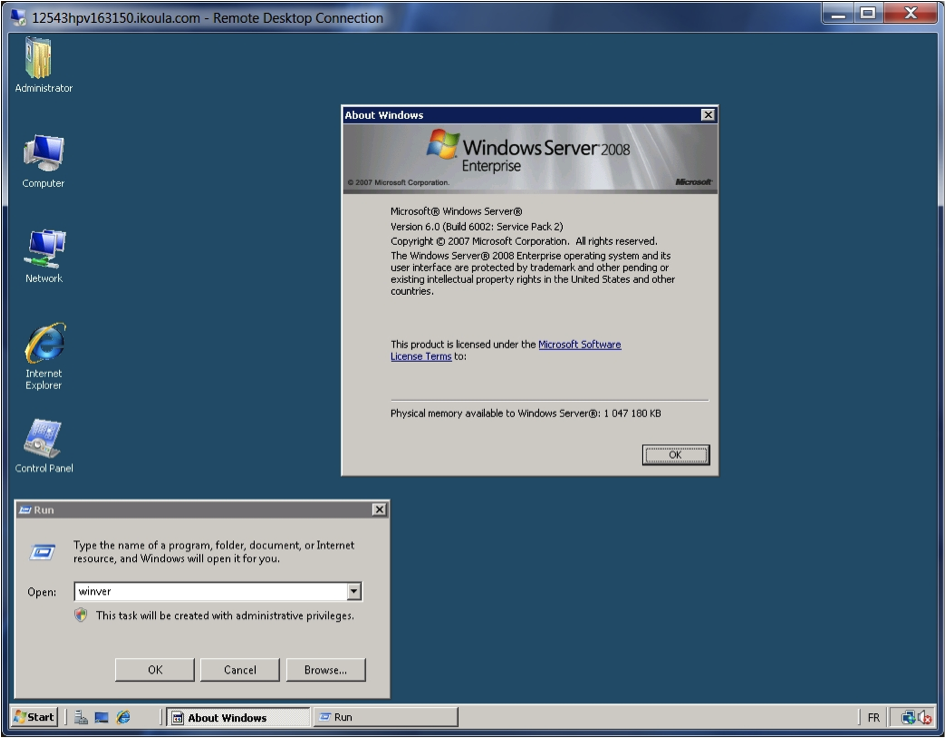
This document was written specifically for 64-bit editions of Windows Server 2008. However, you should be able to use other versions without any complications.
The exact version of operating software used in the screenshots is Windows Server 2008 Enterprise Edition with Service Pack 2, 64-bit edition.
32-bit Versions of Windows
The tutorial is easily portable to 32-bit versions of Windows, by replacing the following references in the text:
-
On 64-bit editions:
C:\Program Files (x86)\andC:\Windows\SysWOW64\ -
On 32-bit editions:
C:\Program Files\andC:\Windows\System32\
About Editions other than Enterprise
Also, if you don't have Enterprise Edition, this is not a problem. This document is directly portable to other editions of Windows Server software: Windows Server 2008 Web, Standard or Datacenter Windows Server 2008 Web, Standard or Datacenter with Service Pack 2 Windows Server 2008 R2 Web, Standard, Enterprise or Datacenter editions.
Please note that all editions of Windows Server 2008 R2 are only available as 64-bit operating systems.
About International Editions
The regional settings used in the screenshots are en-US. We also installed an international language package for France.
It is possible to execute the tutorial on Windows client operating systems: Windows XP, Windows Vista and Windows Seven both in x64 and x86 modes.
Web Server used throughout the Document
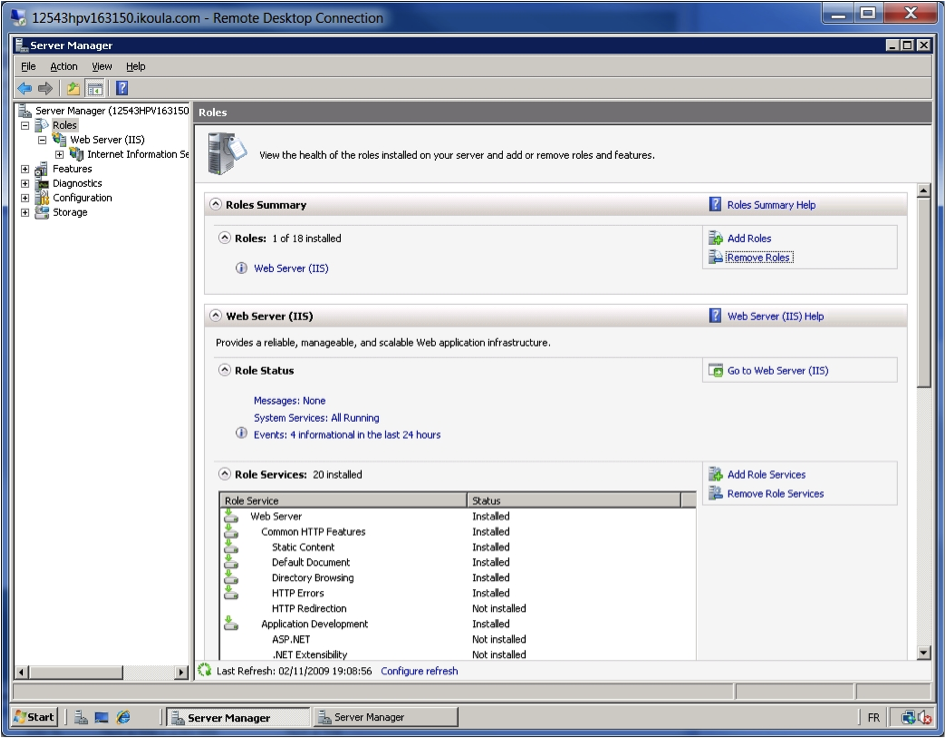
The web server used is Microsoft Internet Information Server version 7.0, which is included in all Windows Server 2008 editions as a role. We begin the tutorial with a fully functional Windows Server 2008 server and install IIS from scratch. The install steps use the default choices, we simply add two specific modules that come with the IIS 7.0 modular design: FastCGI and URL Rewrite.
Databases
SQLite is the pre-configured database for the symfony sandbox. On Windows, there's nothing specific to install: SQLite support is directly implemented in the PDO PHP extension for SQLite, which is installed at the time of PHP installation.
Hence, there's no need to download and run a separate instance of SQLITE.EXE:
  [PHP_PDO_SQLITE]
  extension=php_pdo_sqlite.dll
Windows Server Configuration
It is better to use a fresh installation of Windows Server in order to match the step-by-step screenshots in this chapter.
Of course you can work directly on an existing machine, but you may encounter differences due to installed software, runtime, and regional configurations.
In order for you to get the same screenshots as displayed in this tutorial, we recommend obtaining a dedicated Windows Server in a virtual environment, available for free on the Internet for a period of 30 days.
How to get a free Windows Server Trial?
It is of course possible to use any dedicated server with Internet access. A physical server or even virtual dedicated server (VDS) will work perfectly.
A 30-day server with Windows is available as a trial from Ikoula, a French web host who offers a comprehensive list of services for developers and designers. This trial starts at 0 € / month for a Windows virtual machine running in a Microsoft Hyper-V environment. Yes, you can get a fully functional virtual machine with Windows Server 2008 Web, Standard, Enterprise or even Datacenter edition for FREE for a period of 30 days.
To order, just open your browser to http://www.ikoula.com/flex_server and click on the "Testez gratuitement" button.
In order to get the same messages as outlined in this document, the operating system we ordered with the Flex server is: "Windows Server 2008 Enterprise Edition 64 bits". This is an x64 distribution, delivered with both fr-FR and en-US locales. It's easy to switch from
fr-FRtoen-USand vice-versa from the Windows Control Panel. Specifically, this setting can be found in the "Regional and Language Options", which lives under the "Keyboards and Languages" tab. Just click on "Install/uninstall languages".
It is mandatory to have Administrator access to the server.
If working from a remote workstation, the reader should run Remote Desktop Services (formerly known as Terminal Server Client) and ensure he has Administrator access.
The distribution used here is: Windows Server 2008 with Service Pack 2.
Windows Server 2008 was installed with the graphical environment, which matches Windows Vista's look and feel. It is also possible to use a command-line only for version of Windows Server 2008 with the same services in order to reduce the size of the distribution (1.5 GB instead of 6.5 GB). This also reduces the attack surface and the number of Windows Update patches that will need to be applied.
Preliminary Checks - Dedicated Server on the Internet
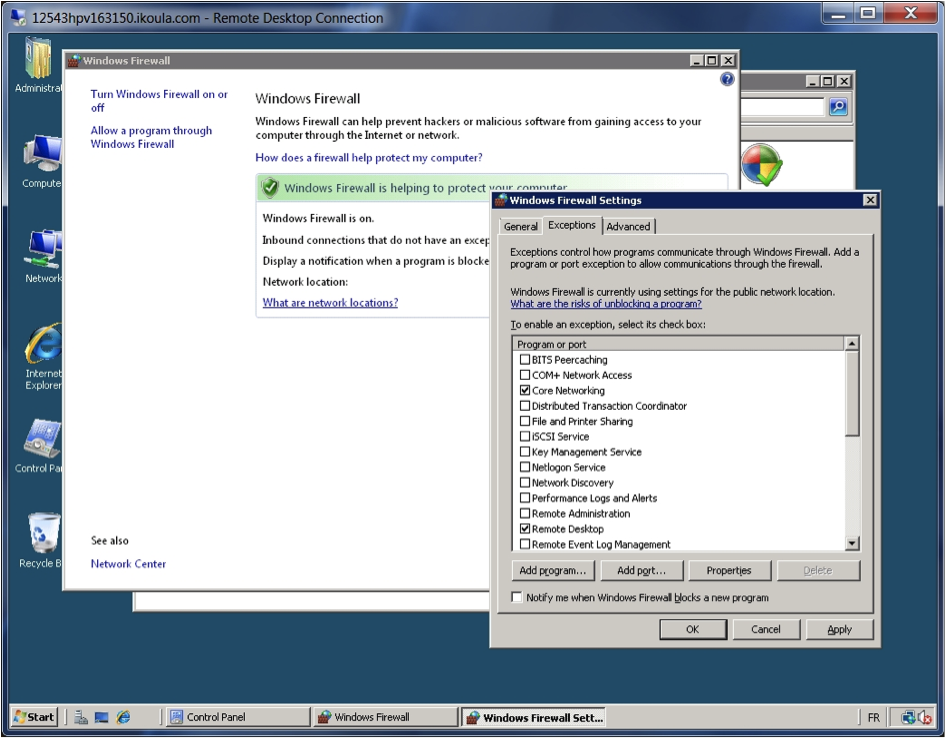
Since the server is directly accessible on the Internet, it's always a good idea to check that the Windows Firewall is providing active protection. The only exceptions that should be checked are:
- Core Networking
- Remote Desktop (if accessed remotely)
- Secure World Wide Web Services (HTTPS)
- World Wide Web Services (HTTP)
Then, it's always good to run a round of Windows Update to ensure all software pieces are up-to-date with the latest fixes, patches, and documentation.

As a last step of preparation, and for the sake of removing any potential conflicting parameters in the existing Windows distribution or IIS configuration, we recommend that you uninstall the Web role in Windows server, if previously installed.
Installing PHP - Just a few Clicks away
Now, we can install IIS and PHP in one simple operation.
PHP is NOT a part of the Windows Server 2008 distribution, hence we need to first install the Microsoft Web Platform Installer 2.0, referred to as Web PI in the following sections.
Web PI takes care of installing all dependencies necessary for executing PHP on any Windows/IIS system. Hence, it deploys IIS with the minimal Role Services for the Web Server, and also provides minimal options for PHP runtime.

The installation of Microsoft Web Platform Installer 2.0 contains a configuration analyzer, checks for existing modules, proposes any necessary module upgrades, and even allows you to beta-test un-released extensions of the Microsoft Web Platform.

Web PI 2.0 offers PHP runtime installation in one click. The selection installs the "non-thread safe" Win32 implementation of PHP, which is best associated with IIS 7 and FastCGI. It also offers the most recently tested runtime, here 5.2.11. To find it, just select the "Frameworks and Runtimes" tab on the left:
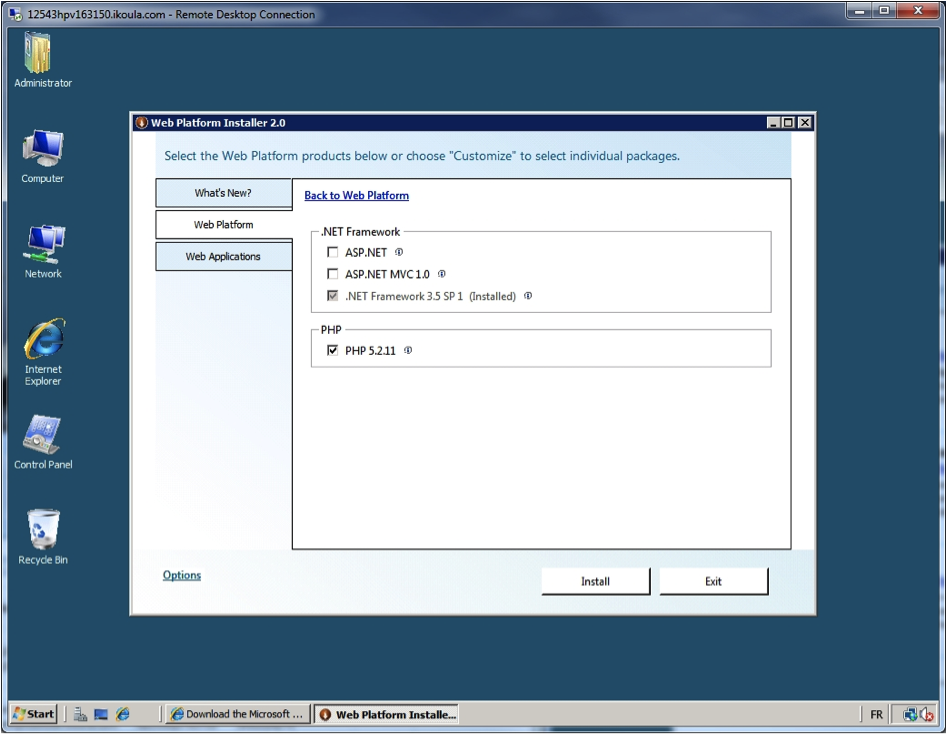
After selecting PHP, Web PI 2.0 automatically selects all dependencies needed to service .php web pages stored on the server, including the minimal IIS 7.0 roles services:
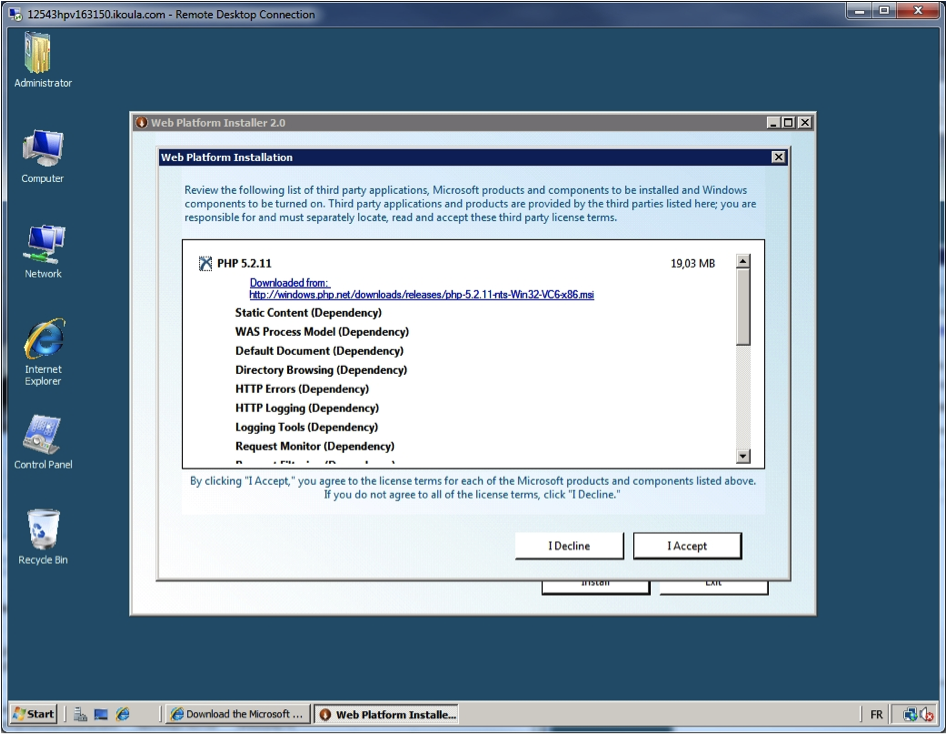
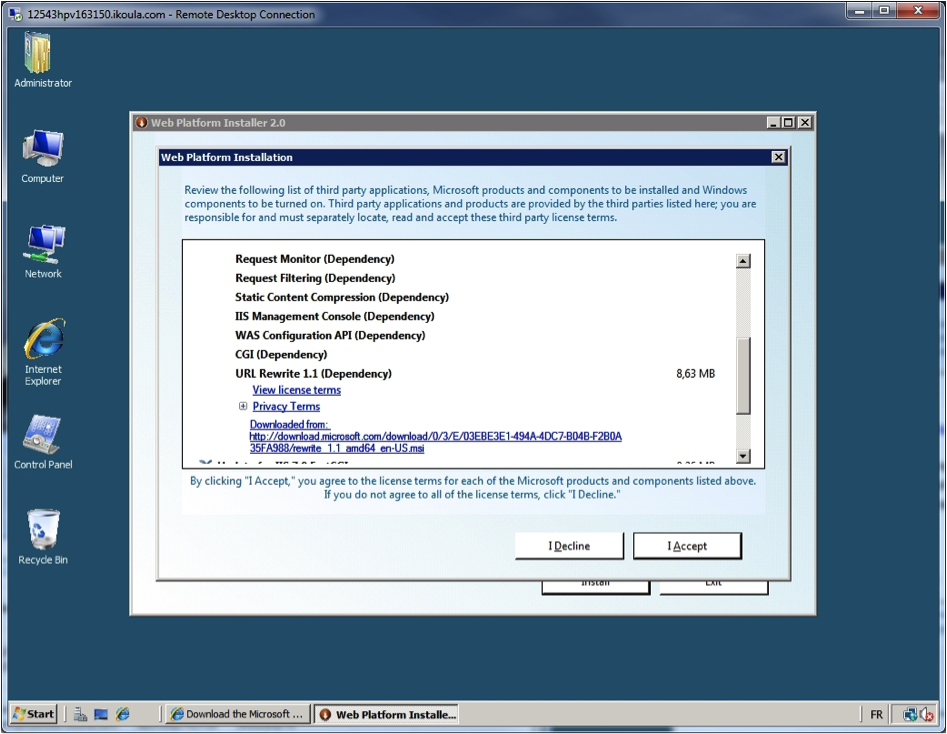

Next, click on Install, then on the "I Accept" button. The installation of IIS components will begin while, in parallel, PHP is downloaded runtime and some module are updated (an update for IIS 7.0 FastCGI for instance).
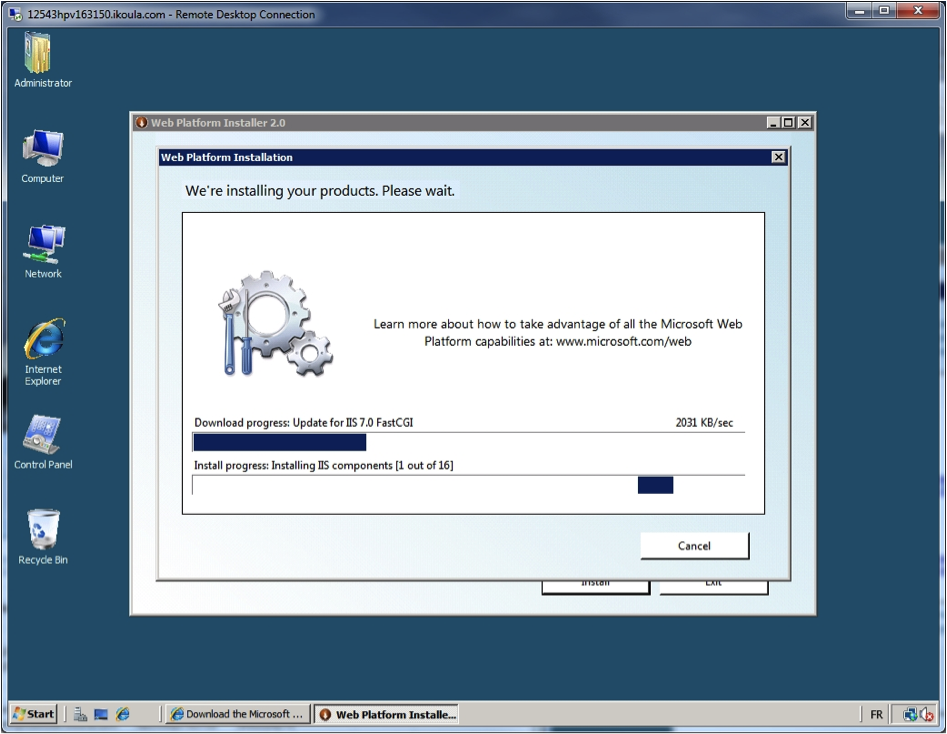
Finally, the PHP setup program executes, and, after a few minutes, should display:
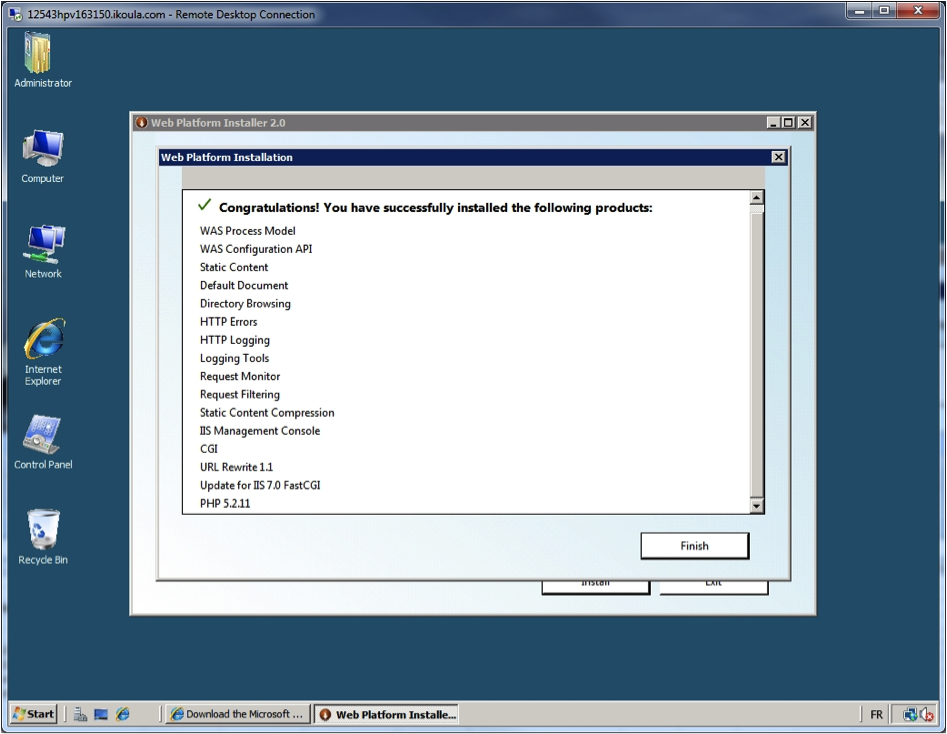
Click on "Finish".
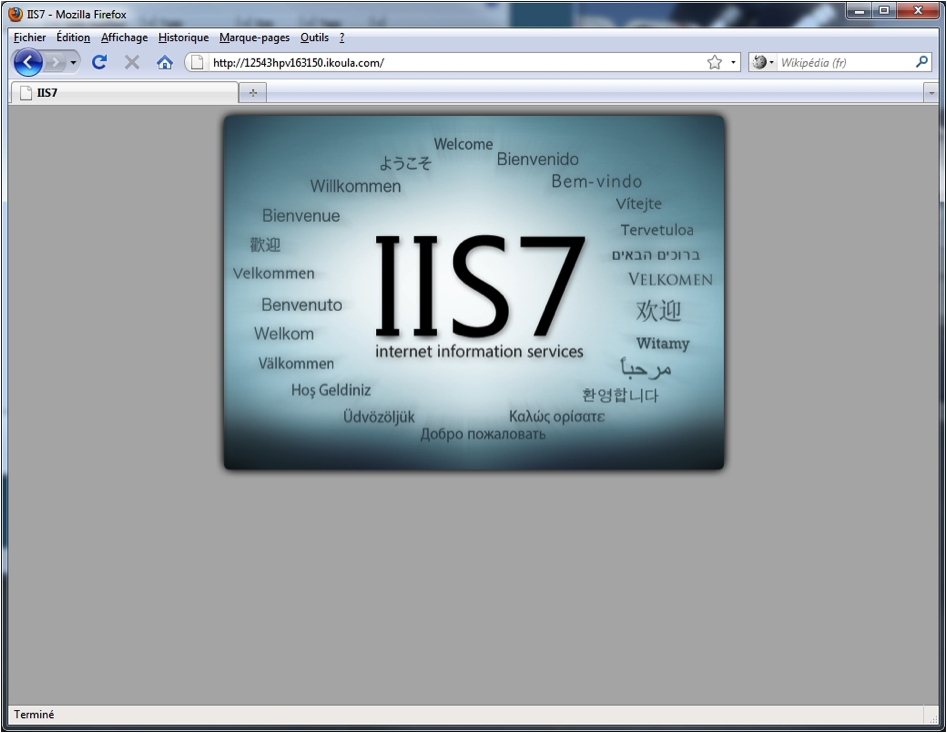
The Windows Server is now listening and able to answer on port 80.
Let's check this in the browser:
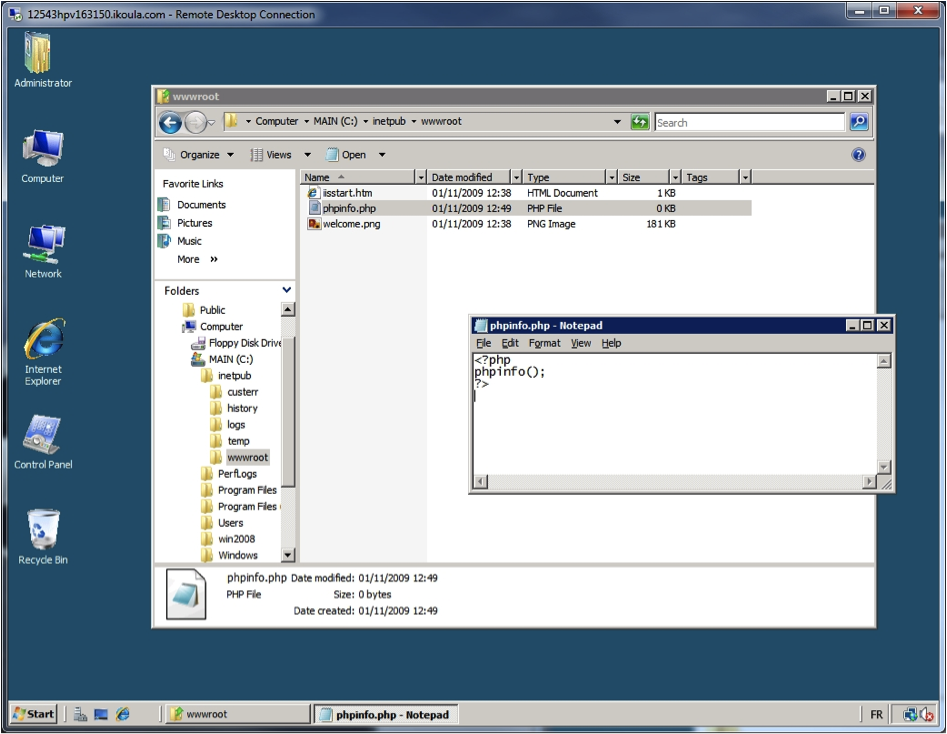
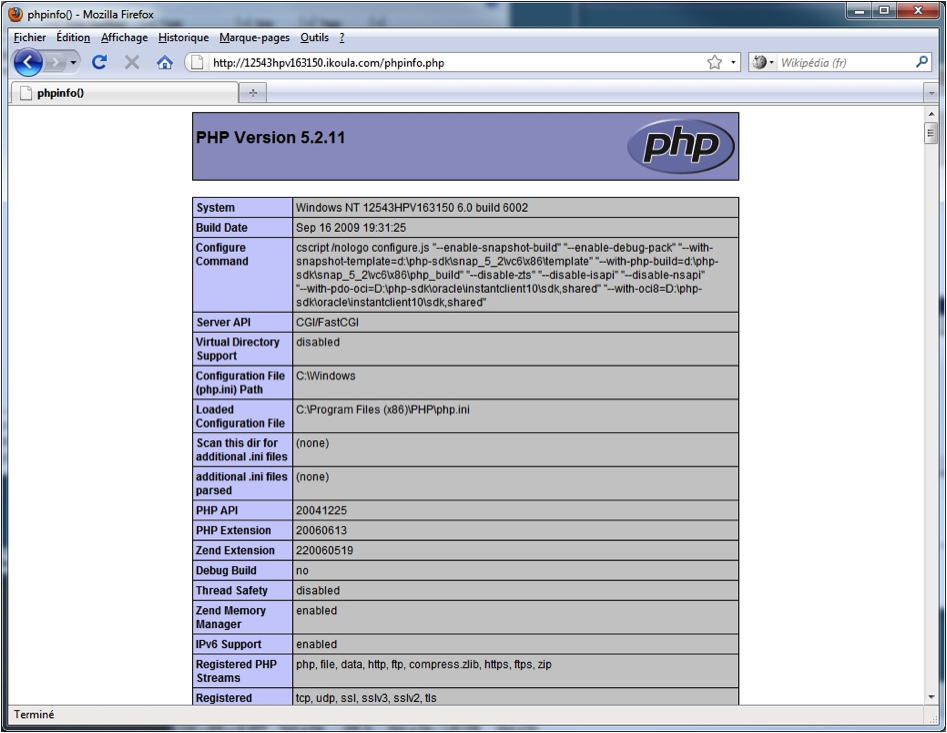
Now, to check that PHP is correctly installed, and available from IIS, we create a small phpinfo.php file to be accessed by the default web server on port 80, at C:\inetpub\wwwroot.
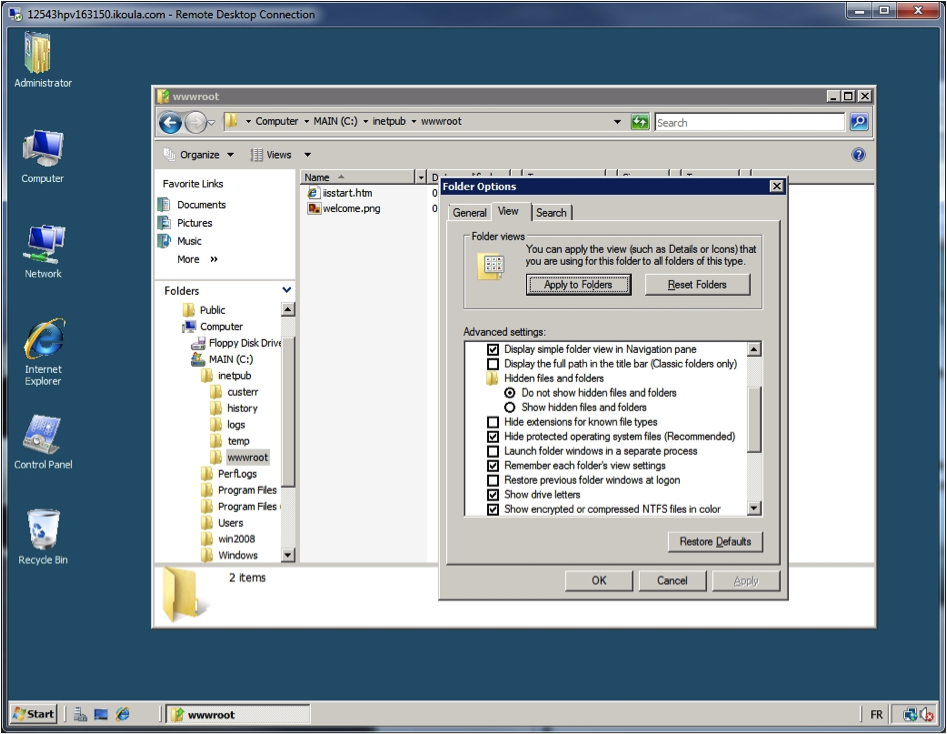
Before doing this, ensure that, in Windows Explorer, we can see the correct extensions of the files. Select "Unhide Extensions for Known Files Types".
Open Windows Explorer, and go to C:\inetpub\wwwroot. Right-click and, select "New Text Document". Rename it to phpinfo.php and copy the usual function call:
Next, re-open the web browser, and put /phpinfo.php at the end of the server's URL:
Finally, to ensure that symfony will install without any problems, download the http://sf-to.org/1.3/check.php.
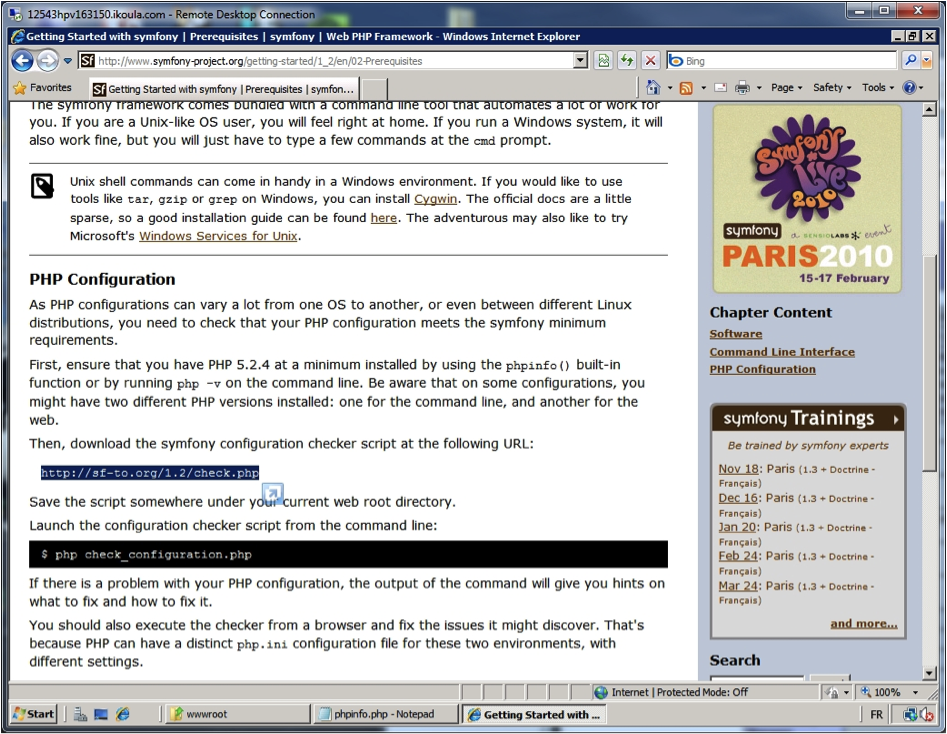
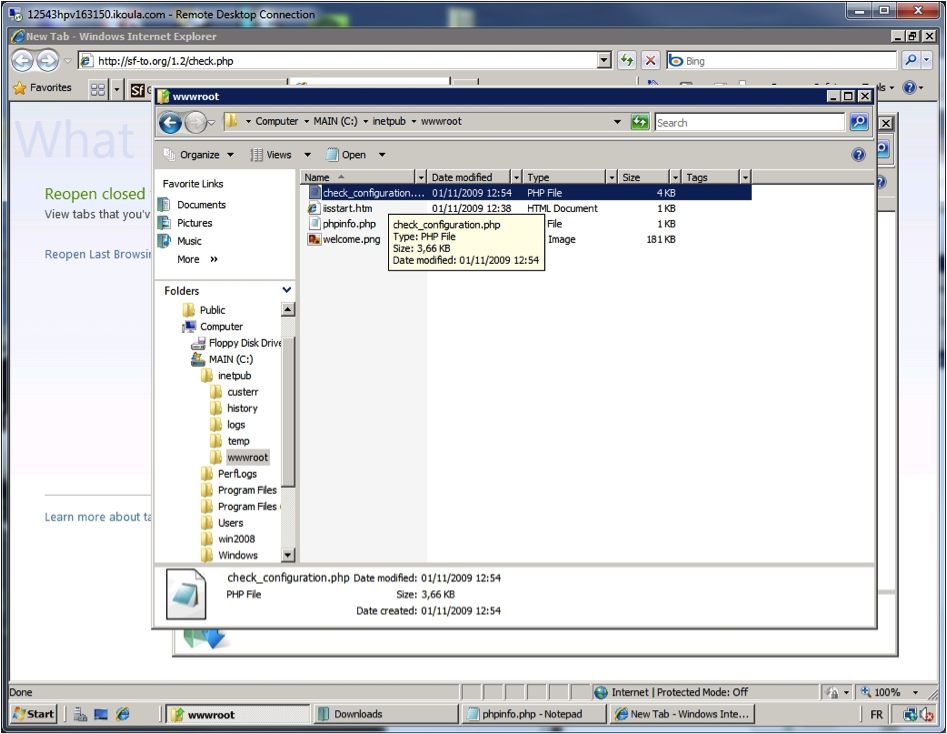
Copy it to the same directory as phpinfo.php (C:\inetpub\wwwroot) and rename it to check_configuration.php if necessary.
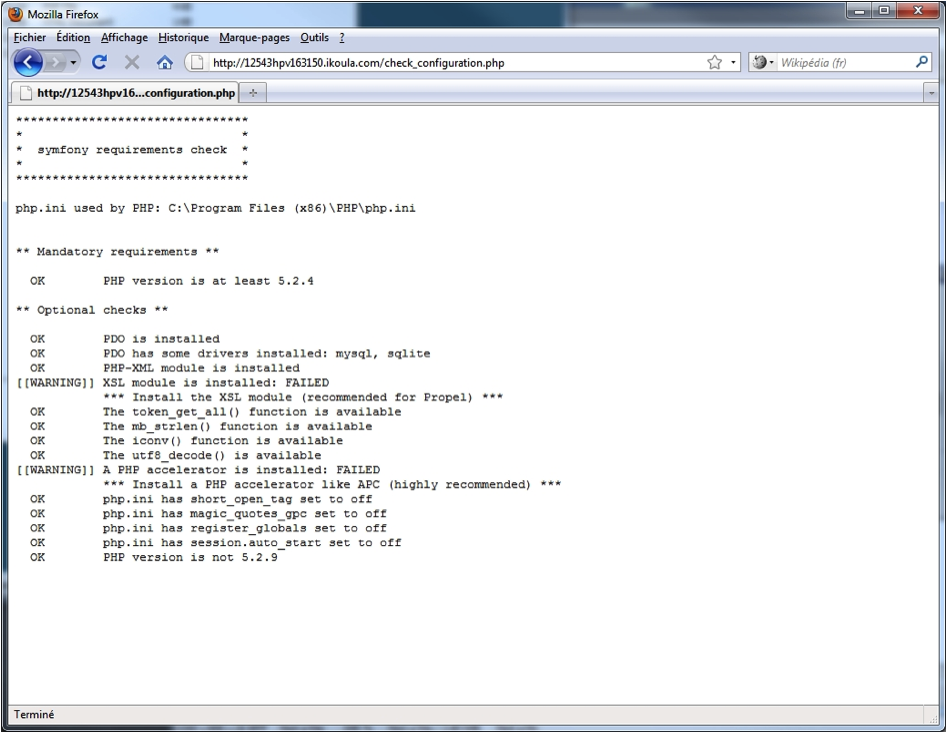
Finally, re-open the web browser one last time for now, and put /check_configuration.php at the end of the server's URL:
Executing PHP from the Command Line Interface
In order to later execute command line tasks with symfony, we need to ensure that PHP.EXE is accessible from the command prompt and executes correctly.
Open a command prompt to C:\inetpub\wwwroot and type
PHP phpinfo.php
The following error message should appear:
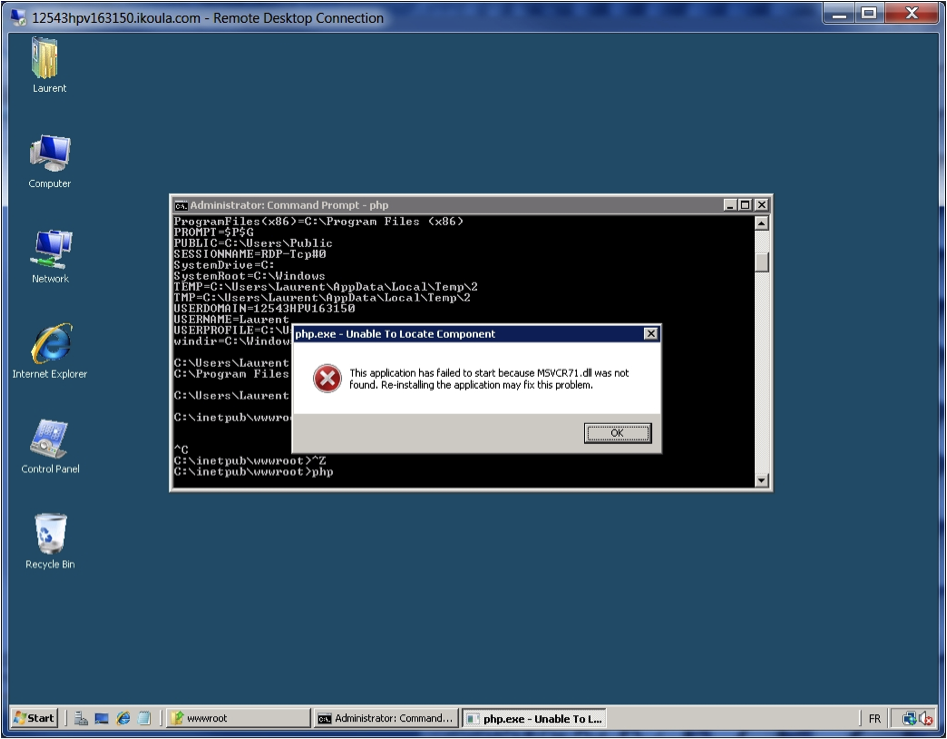
If we don't do anything, the execution of PHP.EXE hangs on the absence of MSVCR71.DLL. So, we must find the DLL file and install it at the correct location.
This MSVCR71.DLL is an old version of the Microsoft Visual C++ runtime, which dates back to the 2003 era. It is contained in the .Net Framework 1.1 redistributable package.
The .Net Framework 1.1 redistributable package, can be downloaded at MSDN
The file we're looking for is installed in the following directory: C:\Windows\Microsoft.NET\Framework\v1.1.4322
Just copy the MSVCR71.DLL file to the following destination:
- on x64 systems: the
C:\windows\syswow64directory - on x86 systems: the
C:\windows\system32directory
We can now uninstall the .Net Framework 1.1.
The PHP.EXE executable can now be run from the command prompt without error. For instance:
PHP phpinfo.php
PHP check_configuration.php
Later, we'll verify that SYMFONY.BAT (from the Sandbox distribution) also gives the expected response, which is the syntax of the symfony command.
Symfony Sandbox Installation and Usage
The following paragraph is an excerpt from the "Getting Started with symfony", "The Sandbox": page: "The sandbox is a dead-easy-to-install pre-packaged symfony project, already configured with some sensible defaults. It is a great way to practice using symfony without the hassle of a proper installation that respects the web best practices".
The sandbox is pre-configured to use SQLite as a database engine. On Windows, there's nothing specific to install: SQLite support is directly implemented in the PDO PHP extension for SQLite, which is installed at the time of PHP's installation. We already accomplished this earlier when the PHP runtime was installed via the Microsoft Web PI.
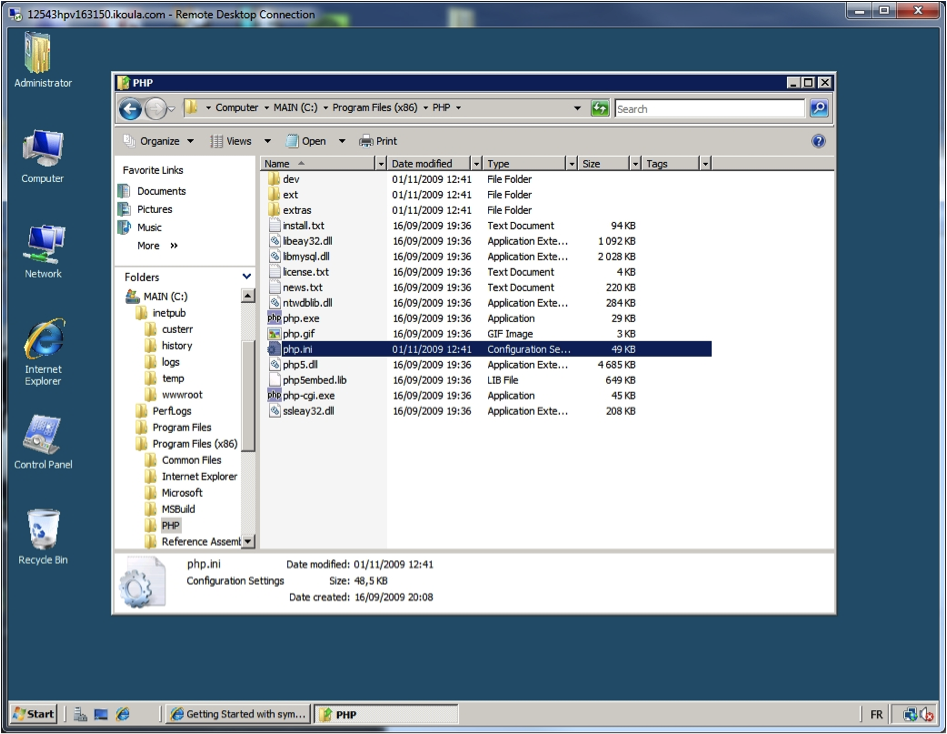
Simply check that the SQLite extension is correctly referred to in the PHP.INI file, which resides in the C:\Program Files (x86)\PHP directory, and that the DLL implementing PDO support for SQLite is set to C:\Program Files (x86)\PHP\ext\php_pdo_sqlite.dll.
Download, create Directory, copy all Files
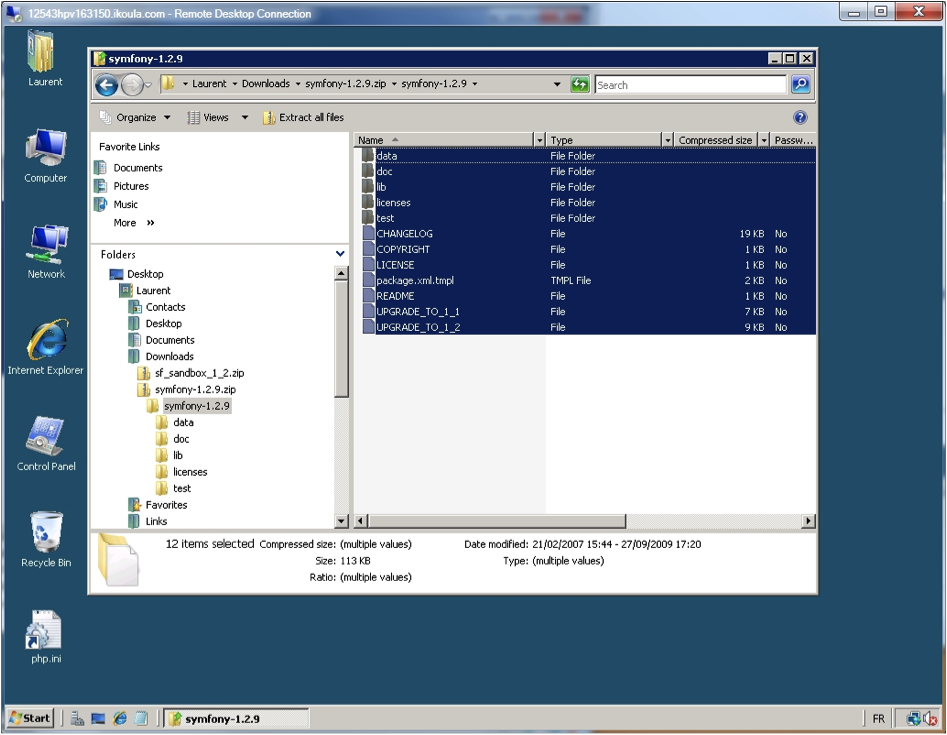
The symfony sandbox project is "ready to install and run", and comes in a .zip archive.
Download the archive and extract it to a temporary location, such as the "downloads" directory, which is available for R/W in the C:\Users\Administrator directory.

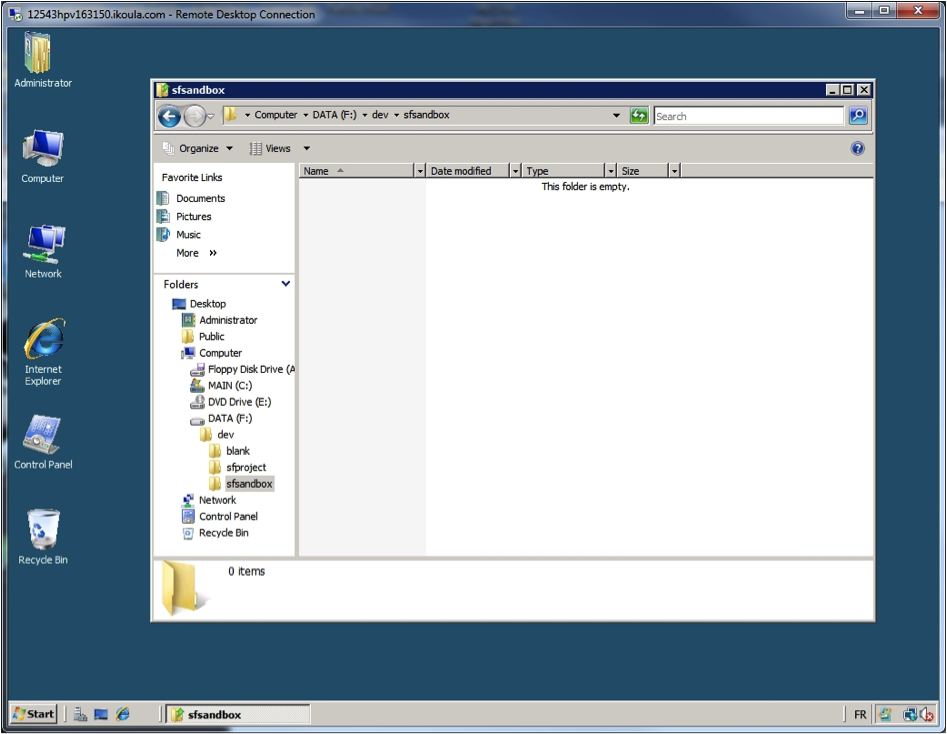
Create a directory for the final destination of the sandbox, such as F:\dev\sfsandbox:
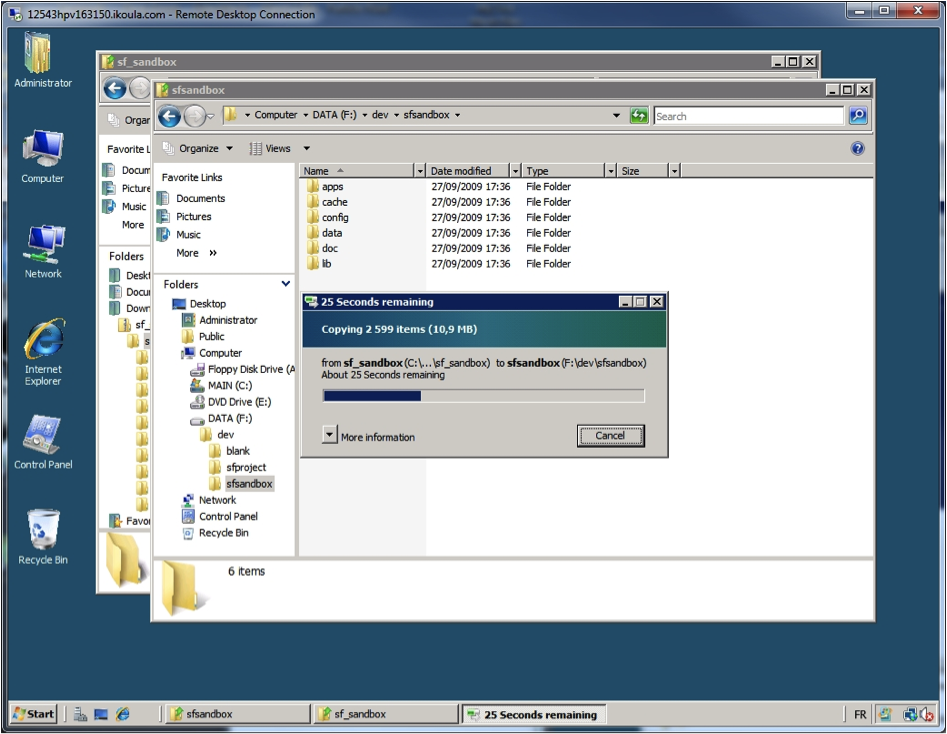
Select all files - CTRL-A in Windows Explorer - from your download location (source), and copy them to the F:\dev\sfsandbox directory.
You should see 2599 items copied to the destination directory:
Execution Test
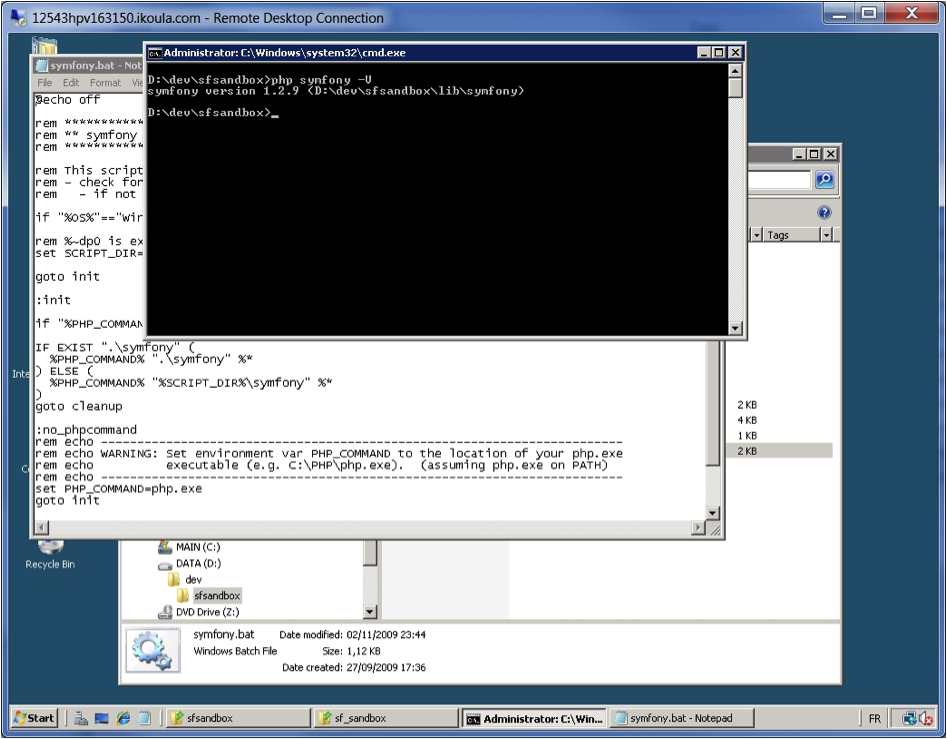
Open the command prompt. Change to F:\dev\sfsandbox and execute the following command:
PHP symfony -V
This should return:
symfony version 1.3.0 (F:\dev\sfsandbox\lib\symfony)
From the same command prompt, execute:
SYMFONY.BAT -V
This should return the same result:
symfony version 1.3.0 (F:\dev\sfsandbox\lib\symfony)
Web Application Creation
To create a web application on the local server, we use the IIS7 manager, which is the graphical user interface control panel for all IIS related activities. All actions triggered from that UI are actually executed behind-the-scenes via the command line interface.
The IIS Manager console is accessible from the Start Menu at Programs, Administrative Tools, Internet Information Server (IIS) Manager.
Reconfigure "Default Web Site" so it does not interfere on Port 80
We want to ensure that only our symfony sandbox is responding on port 80 (HTTP). To do this, change the existing "Default Web Site" port to 8080.
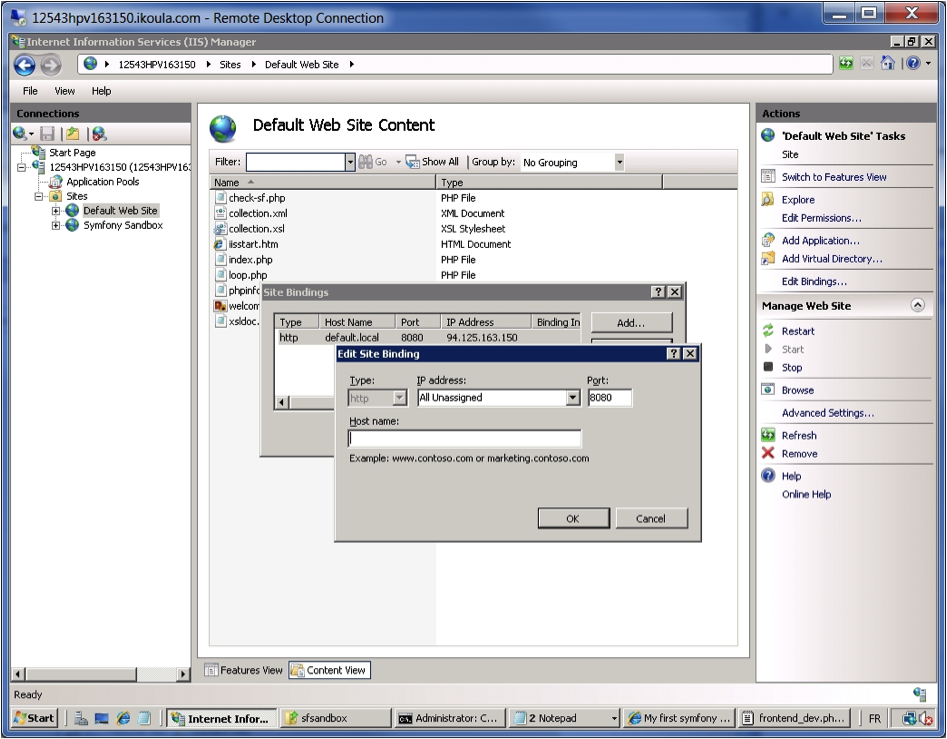
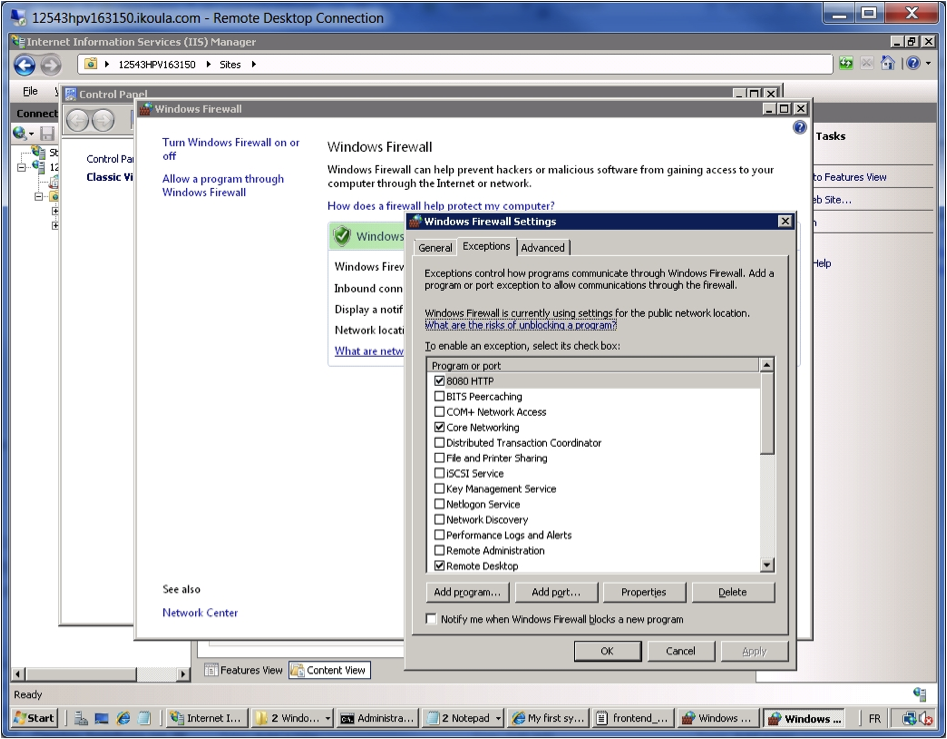
Please note that if Windows Firewall is active, you may have to create an exception for port 8080 to still be able to reach the "Default Web Site". For that purpose, Go to Windows Control Panel, select Windows Firewall, click on "Allow a program through Windows Firewall", and click on "Add port" to create that exception. Check the box to enable it after creation.
Add a new web Site for the Sandbox
Open IIS Manager from Administration Tools. On the left pane, select the "Sites" icon, and right-click. Select Add Web Site from the popup menu. Enter, for instance, "Symfony Sandbox" as the Site name, D:\dev\sfsandbox for the Physical Path, and leave the other fields unchanged. You should see this dialog box:
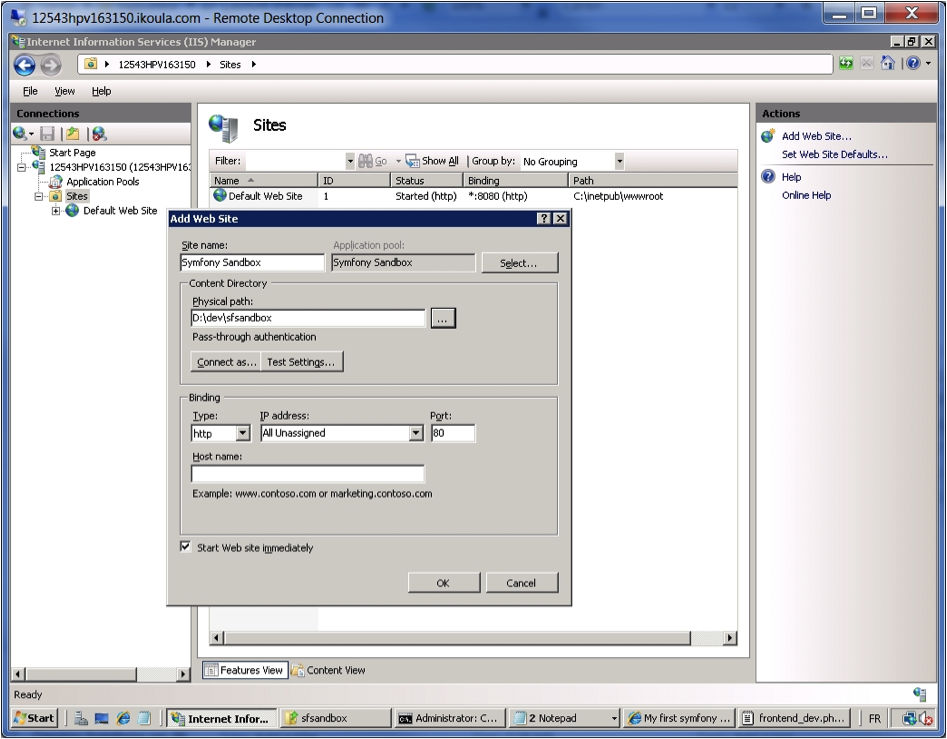
Click OK. If a small x appears on the web site icon (in Features View / Sites), don't hesitate to click "Restart" on the right pane to make it disappear.
Check if the Web Site is Answering
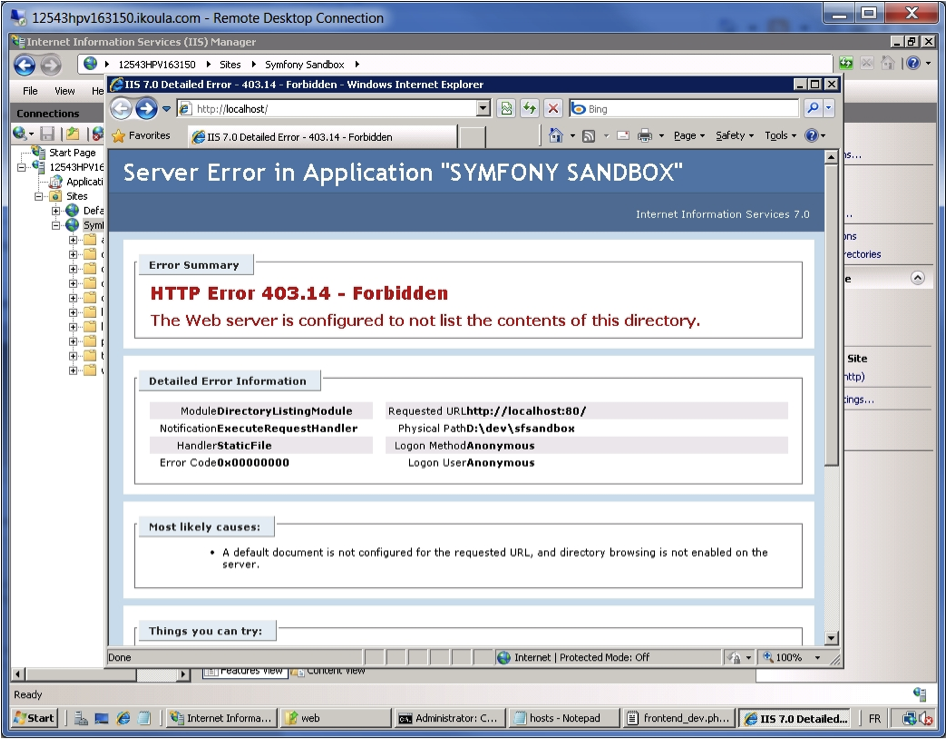
From IIS Manager, select the "Symfony Sandbox" site, and, on the Right pane, click on "Browse *.80 (http)".

You should get an explicit error message, this is not unexpected: HTTP Error 403.14 - Forbidden. The Web server is configured to not list the contents of this directory.
This originates from the default web server configuration, which specifies that the contents of this directory should not be listed. Since no default file such as index.php or index.html exists at D:\dev\sfsandbox, the server correctly returns the "Forbidden" error message. Don't be afraid.
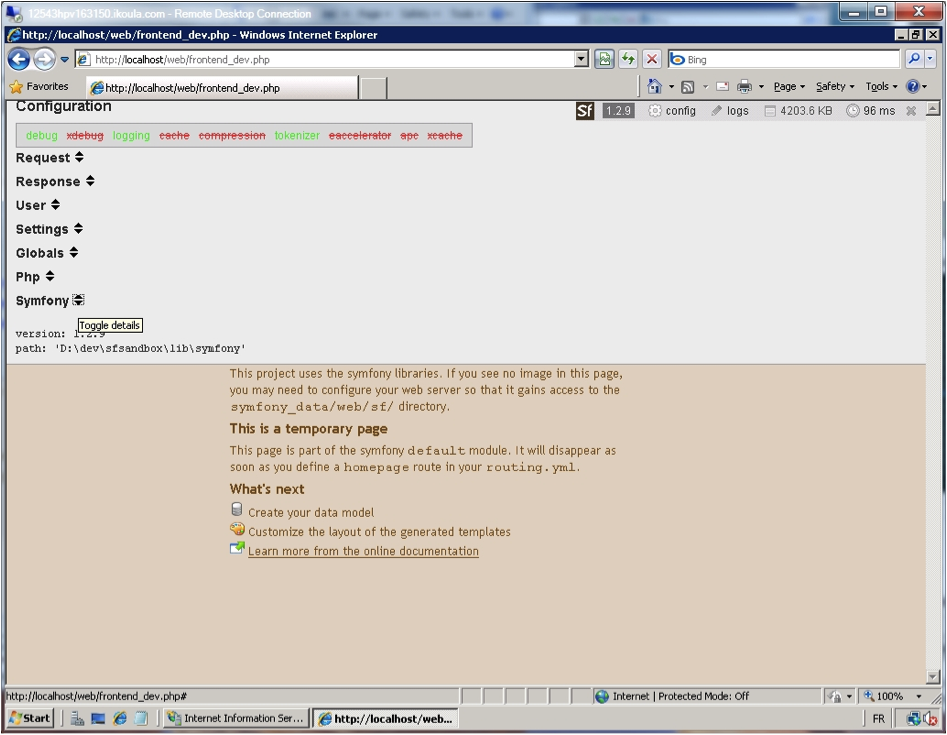
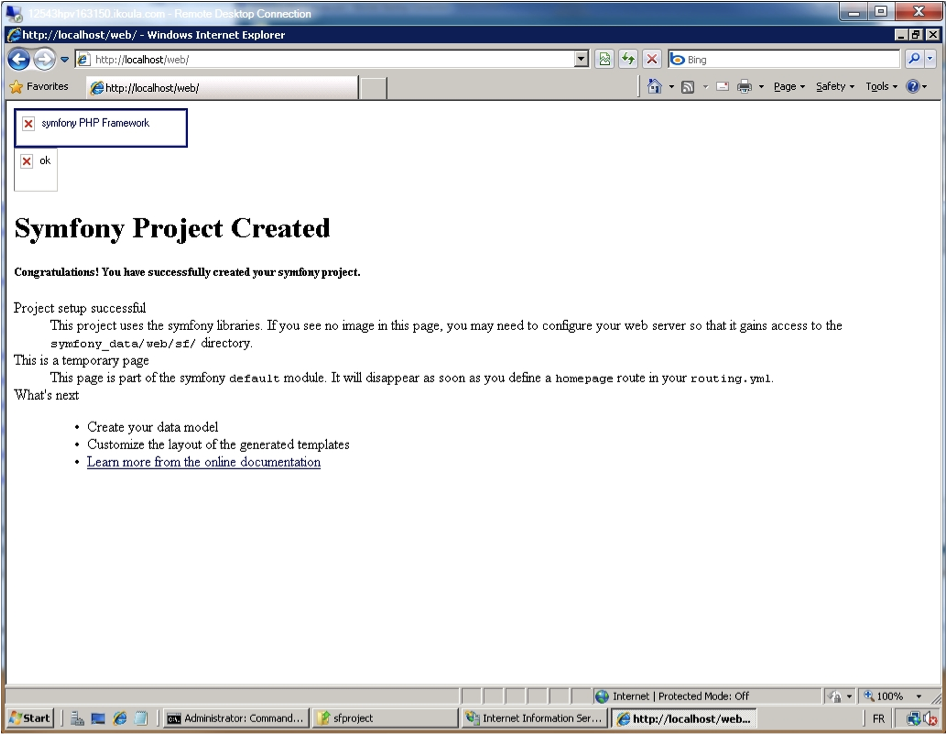
Type http://localhost/web in the URL bar of your browser, instead of just http://localhost. You now should see your browser, by default Internet Explorer, displaying "Symfony Project Created":
By the way, you may see a light yellow band at the top saying "Intranet settings are now turned off by default". Intranet settings are less secure than Internet settings. Click for options. Don't be afraid of this message.
To close it permanently, just right-click the yellow band, and select the appropriate option.
This screen confirms that the default index.php page was correctly loaded from D:\dev\sfsandbox\web\index.php, correctly executed, and that symfony libraries are correctly configured.
We need to perform one last task before beginning to play with the symfony sandbox: configure the front-end web page by importing URL rewrite rules. These rules are implemented as .htaccess files and can be controlled in just a few clicks in the IIS Manager.
Sandbox: Web Front-end Configuration
We want to configure the sandbox application front-end in order to begin to play with the real symfony stuff. By default, the front-end page can be reached and executes correctly when requested from the local machine (i.e. the localhost name or the 127.0.0.1 address).
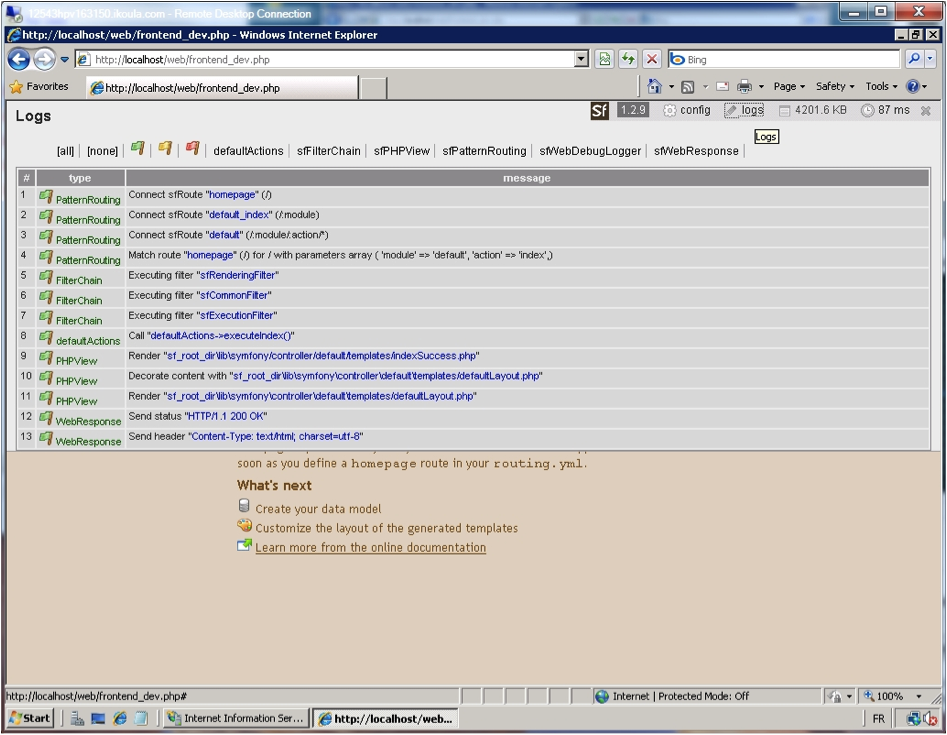
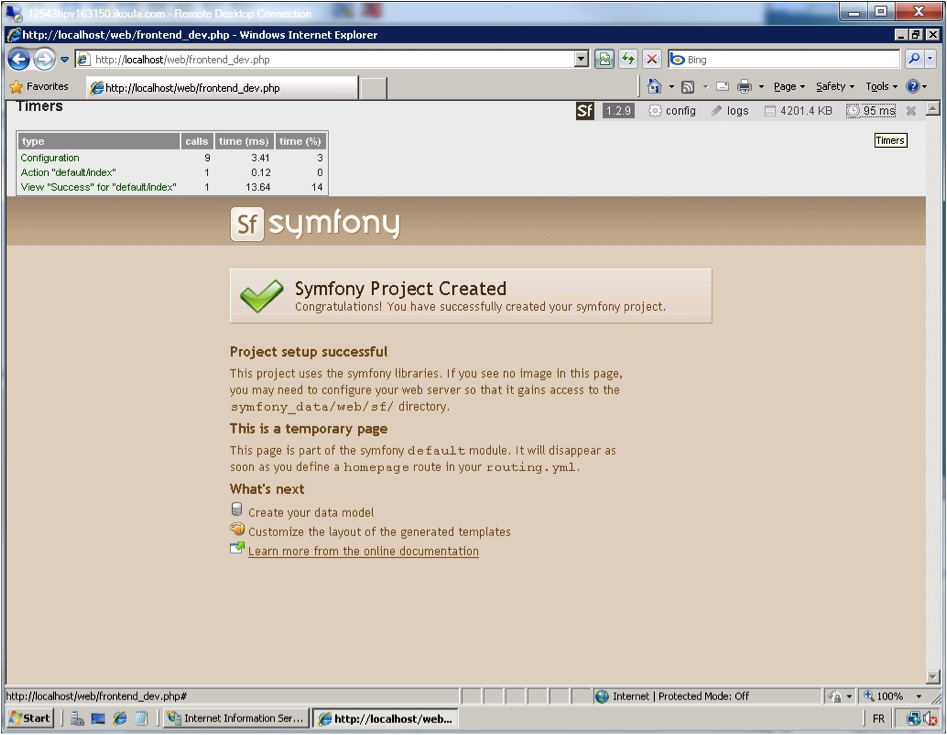
Let's explore the "configuration", "logs" and "timers" web debug panels to ensure that the sandbox is fully functional on Windows Server 2008.
While we could try to request the sandbox application from the Internet or from a remote IP address, the sandbox is mostly designed as a tool to learn the symfony framework on the local machine. Hence, we'll cover details related to remote access in the last section: Project: web Front-end Configuration.
Creation of a new symfony Project
Creating a symfony project environment for real development purposes is almost as straightforward as the installation of the sandbox. We'll see the whole installation process in a simplified procedure, as it is equivalent to the sandbox's installation and deployment.
The difference is that, in this "project" section, we'll focus on the configuration of the web application to make it work from anywhere on the Internet.
Like the sandbox, the symfony project comes pre-configured to use SQLite as a database engine. This was installed and configured earlier in this chapter.
Download, create a Directory and copy the Files
Each version of symfony can be downloaded as a .zip file and then used to create a project from scratch.
Download the archive containing the library from the symfony website. Next, extract the contained directory to a temporary location, such as the "downloads" directory.
Now we need to create a directory tree for the final destination of the project. This is a bit more complicated than the sandbox.
Directory Tree Setup
Let's create a directory tree for the project. Start from the volume root, D: for instance.
Create a \dev directory on D:, and create another directory called sfproject there:
D:
MD dev
CD dev
MD sfproject
CD sfproject
We are now in: D:\dev\sfproject
From there, create a subdirectory tree, by creating the lib, vendor and symfony directories in a cascading manner:
MD lib
CD lib
MD vendor
CD vendor
MD symfony
CD symfony
We now are in: D:\dev\sfproject\lib\vendor\symfony
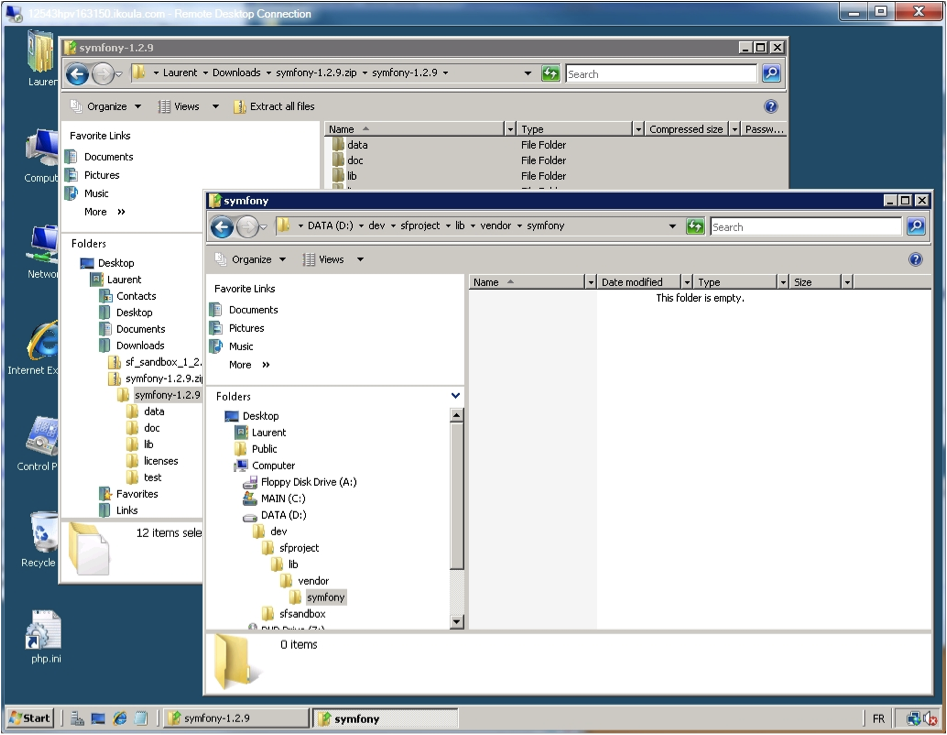
Select all files (CTRL-A in Windows Explorer) from your download location (source), and copy from Downloads to D:\dev\sfproject\lib\vendor\symfony. You should see 3819 items copied to the destination directory:

Creation and Initialization
Open the command prompt. Change to the D:\dev\sfproject directory and execute the following command:
PHP lib\vendor\symfony\data\bin\symfony -V
This should return:
symfony version 1.3.0 (D:\dev\sfproject\lib\vendor\symfony\lib)
To initialize the project, just run the following PHP command line:
PHP lib\vendor\symfony\data\bin\symfony generate:project sfproject
This should return a list of file operations, including some chmod 777 commands:
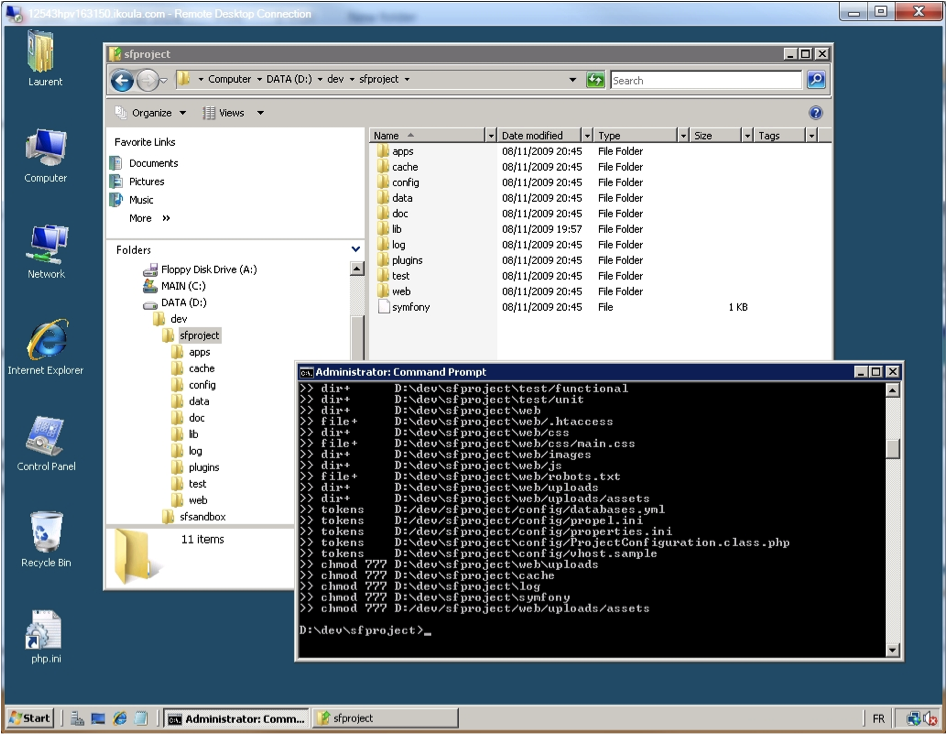
Still within the command prompt, create a symfony application by running the following command:
PHP lib\vendor\symfony\data\bin\symfony generate:app sfapp
Again, this should return a list of file operations, including some chmod 777 commands.
From this point, instead of typing PHP lib\vendor\symfony\data\bin\symfony each time it's needed, copy the symfony.bat file from its origin:
copy lib\vendor\symfony\data\bin\symfony.bat
We now have a convenient command to run at the command-line prompt in D:\dev\sfproject.
Still in D:\dev\sfproject, we can run the now-classic command:
symfony -V
to get the classic answer:
symfony version 1.3.0 (D:\dev\sfproject\lib\vendor\symfony\lib)
Web Application Creation
In the following lines, we assume that you've read the "Sandbox: Web Application Creation" preliminary steps to reconfigure the "Default Web Site", so that it does not interfere on port 80.
Add a new Web Site for the Project
Open IIS Manager from Administration Tools. On the left pane, select the "Sites" icon, and right-click. Select "Add Web Site" from the popup menu. Enter, for instance, "Symfony Project" as the Site name, D:\dev\sfproject for the "Physical Path", and leave other fields unchanged; you should see this dialog box:
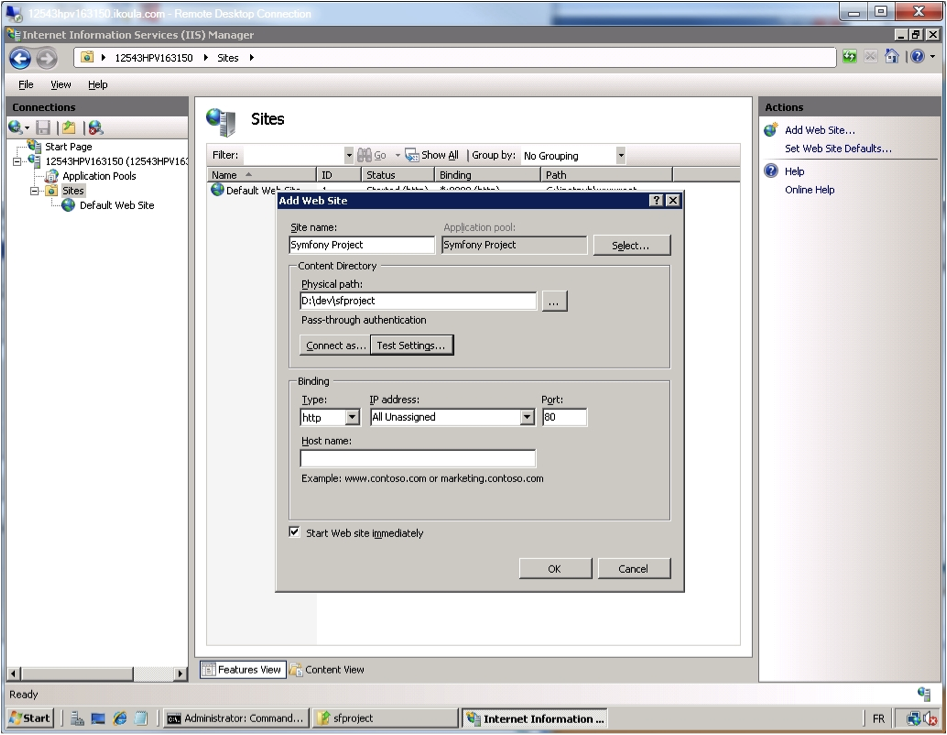
Click OK. If a small x appears on the web site icon (in Features View / Sites), don't hesitate to click "Restart" on the right pane to make it disappear.
Check if the web Site is Answering
From IIS Manager, select the "Symfony Project" site, and, on the Right pane, click "Browse *.80 (http)".
You should get the same explicit error message as you had when trying the sandbox:
HTTP Error 403.14 - Forbidden
The Web server is configured to not list the contents of this directory.
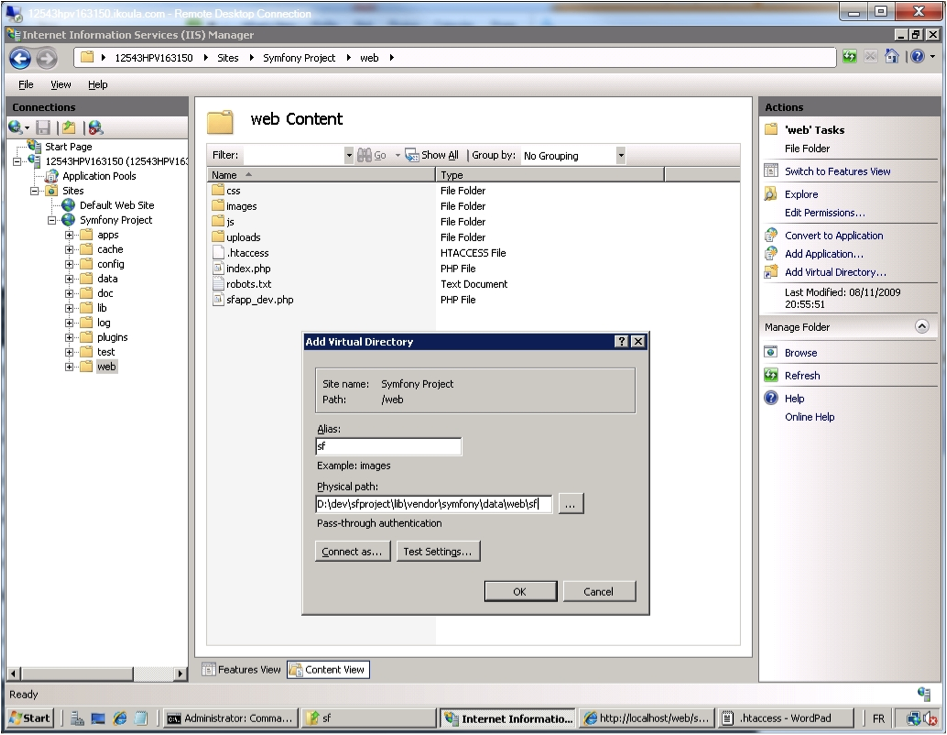
Type http://localhost/web in the URL bar of your browser You should now see the "Symfony Project Created" page, but with one slight difference from the same page resulting from sandbox initialization: there are no images:
The images are not here for the moment, though they're located in an sf directory in the symfony library. It's easy to link them to the /web directory by adding a virtual directory in /web, named sf, and pointing it to D:\dev\sfproject\lib\vendor\symfony\data\web\sf.
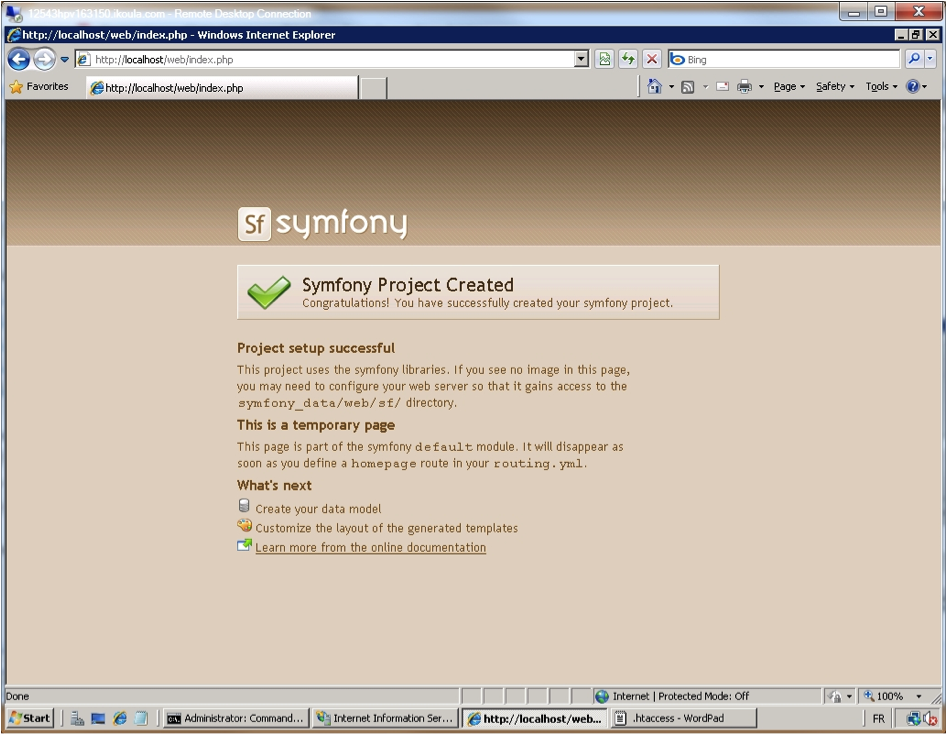
Now we have the regular "Symfony Project Created" page with images as expected:
And finally, the whole symfony application is working. From the web browser, enter the URL of the web application, i.e. http://localhost/web/sfapp_dev.php:
Let's perform one last test while in local mode: check the "configuration", "logs" and "timers" web debug panels to ensure that the project is fully functional.
Application Configuration for Internet-ready Applications
Our generic symfony project is now working locally, like the sandbox, from the local host server, located at http://localhost or http://127.0.0.1.
Now, we'd like to be able to access the application from the Internet.
The default configuration of the project protects the application from being executed from a remote location, though, in reality it should be ok to access both the index.php and sfapp_dev.php files. Let's execute the project from the web browser, using the server's external IP address (e.g. 94.125.163.150) and the FQDN of our Virtual Dedicated Server (e.g. 12543hpv163150.ikoula.com). You can even use both addresses from inside the server, as they're not mapped to 127.0.0.1:
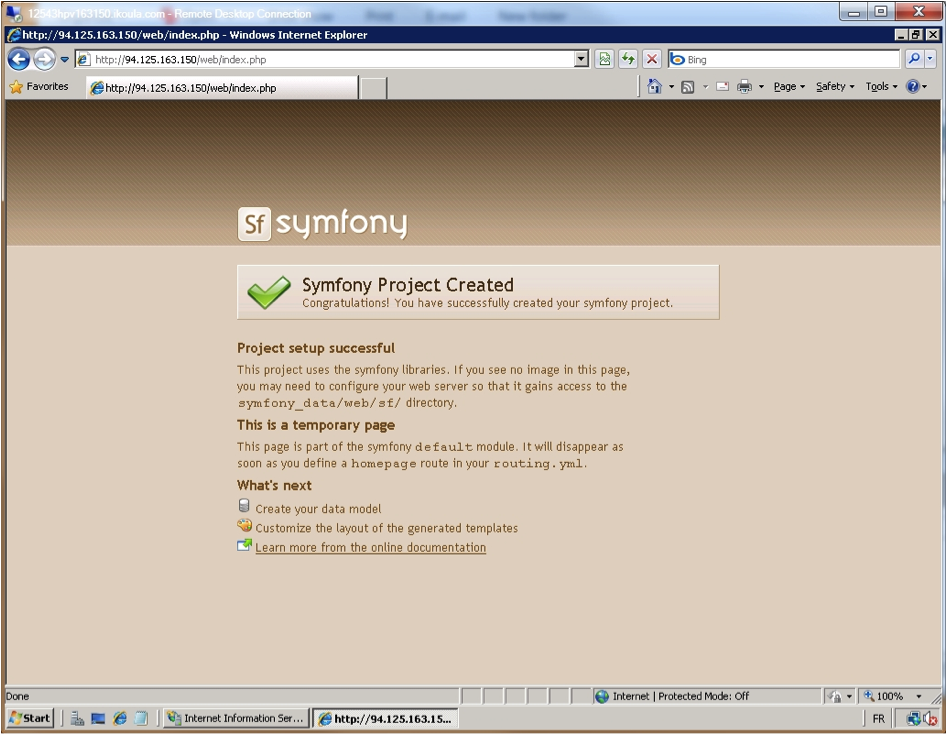
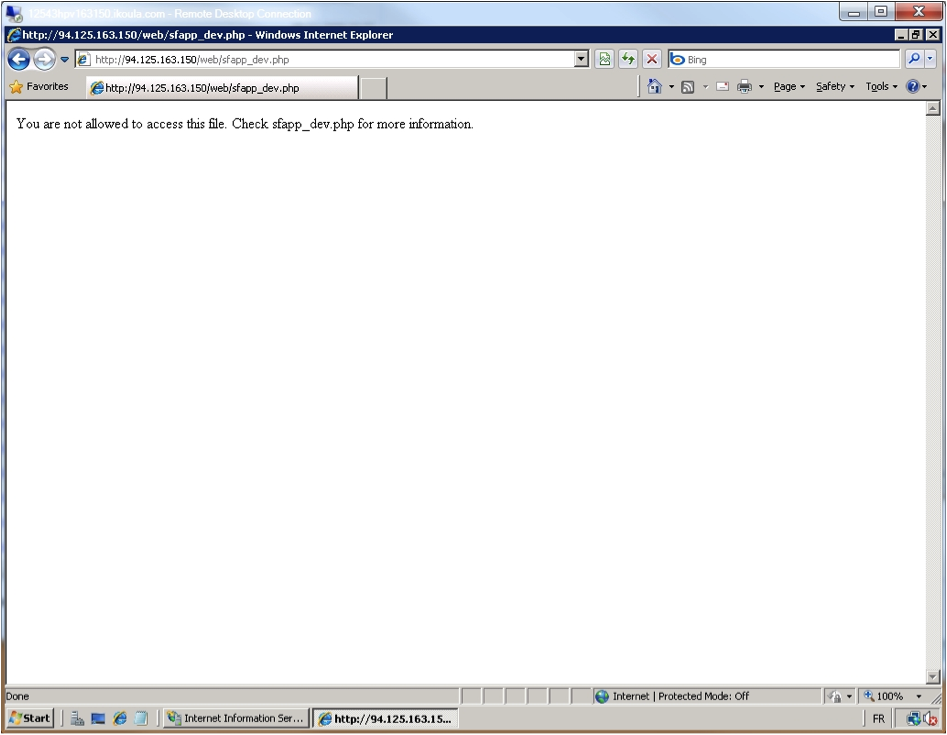
As we said before, access to index.php and sfapp_dev.php from a remote location is ok. The execution of sfapp_dev.php, however fails, as it is not allowed by default. This prevents potentially malicious users from accessing your development environment, which contains potentially sensitive information about your project. You can edit the sfapp_dev.php file to make it work, but this is strongly discouraged.
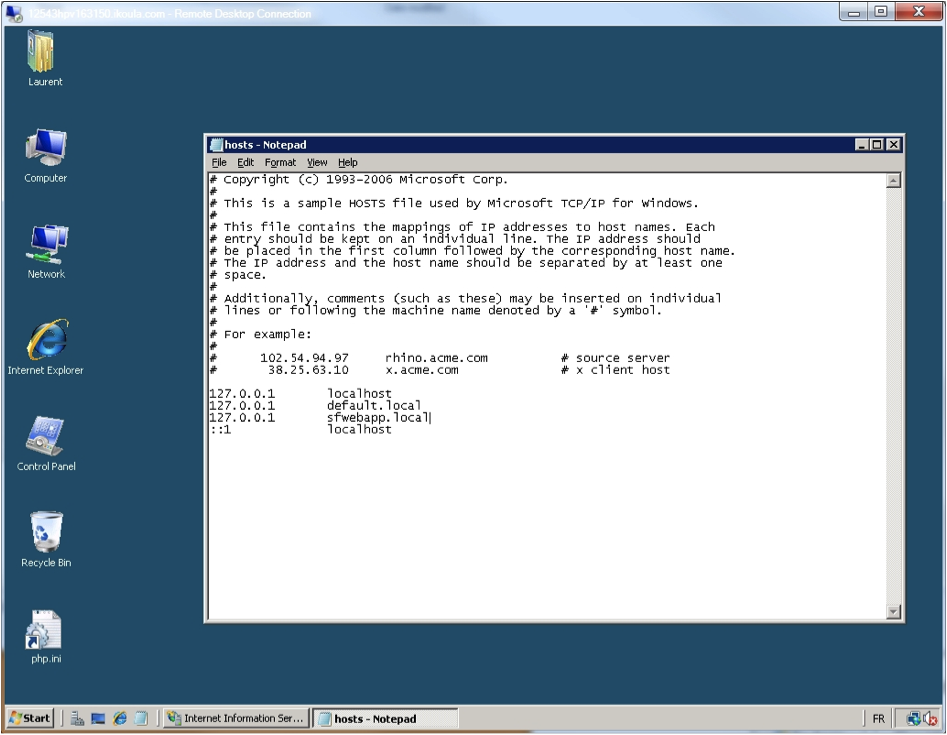
Finally, we can simulate a real domain by editing the "hosts" file.
This file performs the local FQDN name resolution without needing to install the DNS service on Windows. The DNS service is available on all editions of Windows Server 2008 R2, and also in Windows Server 2008 Standard, Enterprise and Datacenter editions.
On Windows x64 operating systems, the "hosts" file is located by default in: C:\Windows\SysWOW64\Drivers\etc
The "hosts" file is pre-populated to have the machine resolve localhost to 127.0.0.1 in IPv4, and ::1 in IPv6.
Let's add a fake real domain name, like sfwebapp.local, and have it resolve locally.
Your symfony project now runs on the Web, without DNS, from a web browser session executed from within the Web server.
インデックス
Document Index
関連ページリスト
Related Pages
 Introduction
- Advanced Routing
- Enhance your Productivity
- Emails
- Custom Widgets and Validators
- Advanced Forms
- Extending the Web Debug Toolbar
- Advanced Doctrine Usage
- Taking Advantage of Doctrine Table Inheritance
- Symfony Internals
- Windows and symfony
- Developing for Facebook
- Leveraging the Power of the Command Line
- Playing with symfony's Config Cache
- Working with the symfony Community
- Appendix A - JavaScript code for sfWidgetFormGMapAddress
- About the Authors
- Appendix B - Custom Installer Example
- Appendix C - License

日本語ドキュメント
Japanese Documents
- 2011/01/18 Chapter 17 - Extending Symfony
- 2011/01/18 The generator.yml Configuration File
- 2011/01/18 Les tâches
- 2011/01/18 Emails
- 2010/11/26 blogチュートリアル(8) ビューの作成